Create Mission
Create Mission
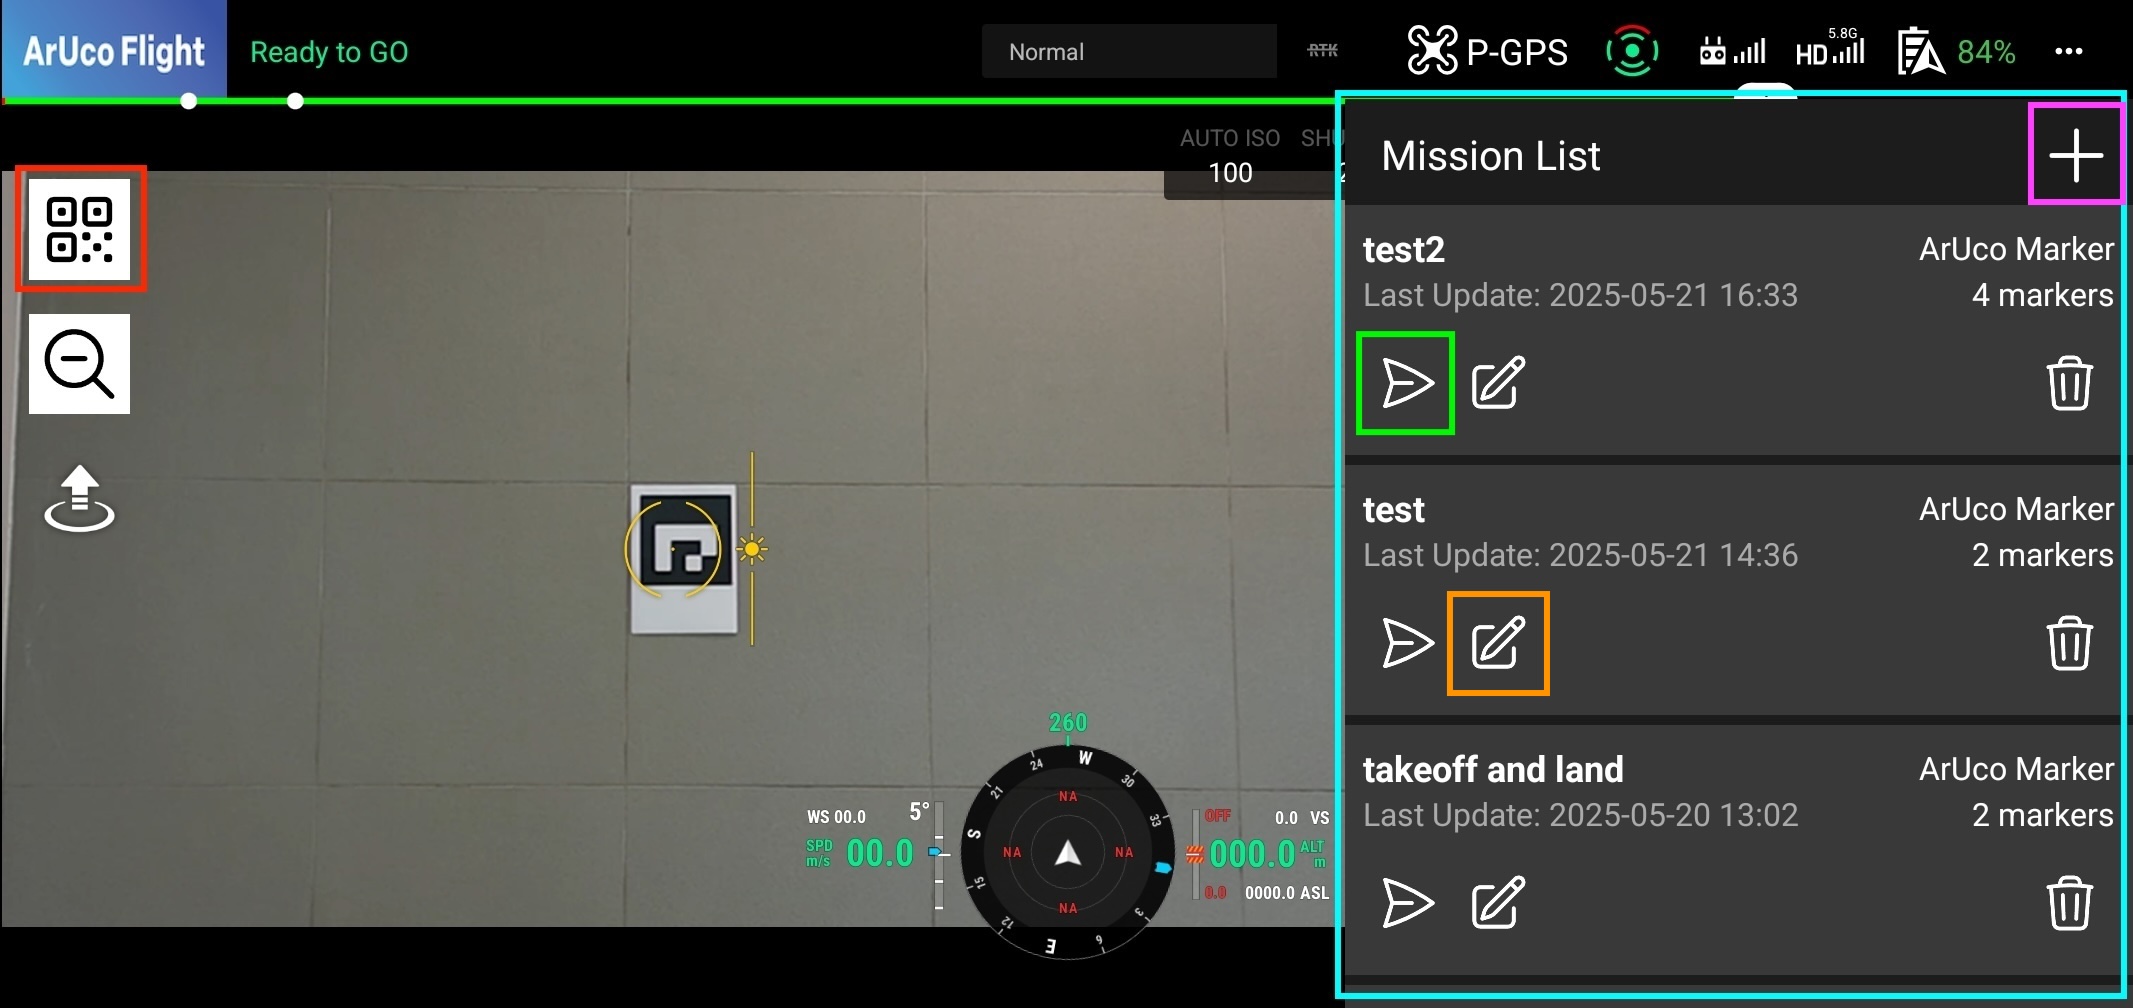
you can create a new mission by clicking the Plus button at the top-right of the mission list. This will open a new form where you can set up the mission configuration.
Mission Tab
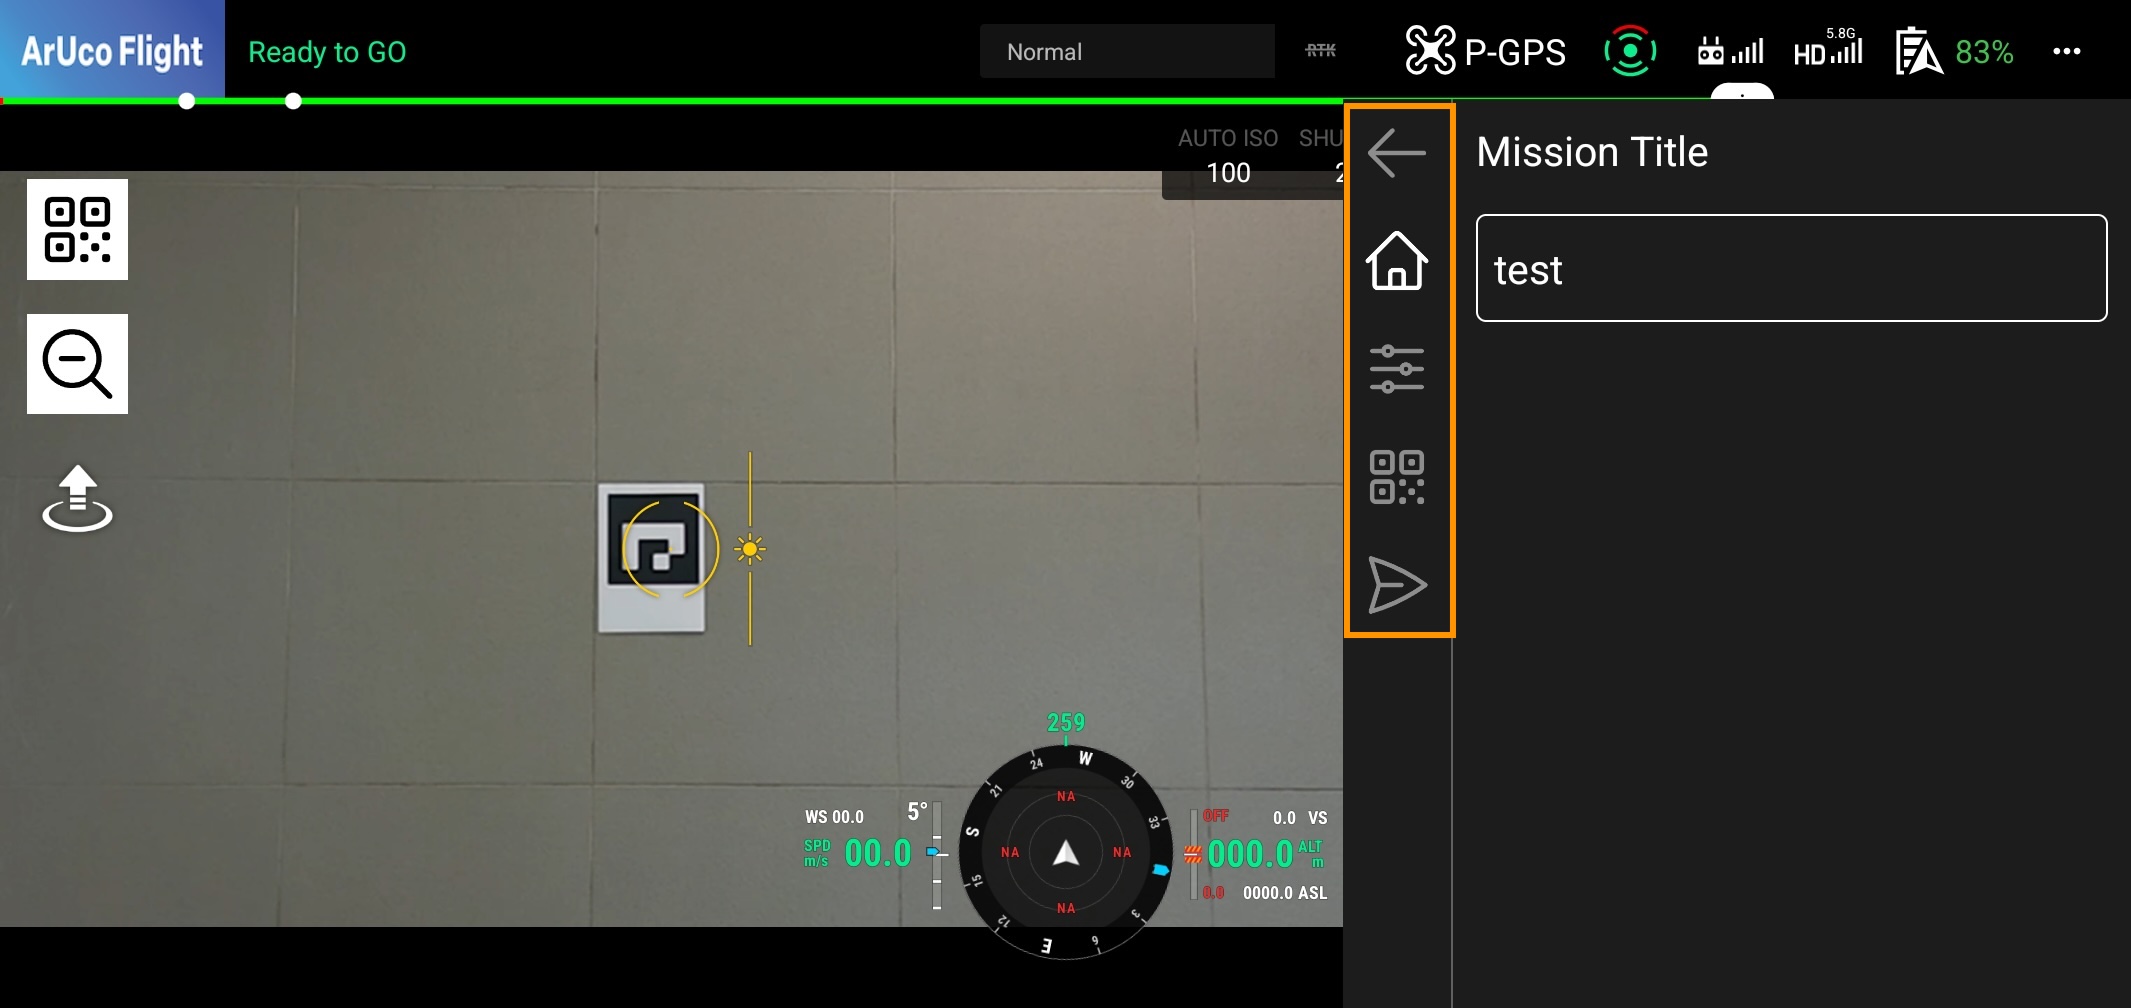
you can switch form between the tabs to set up the mission. The tabs are as follows:
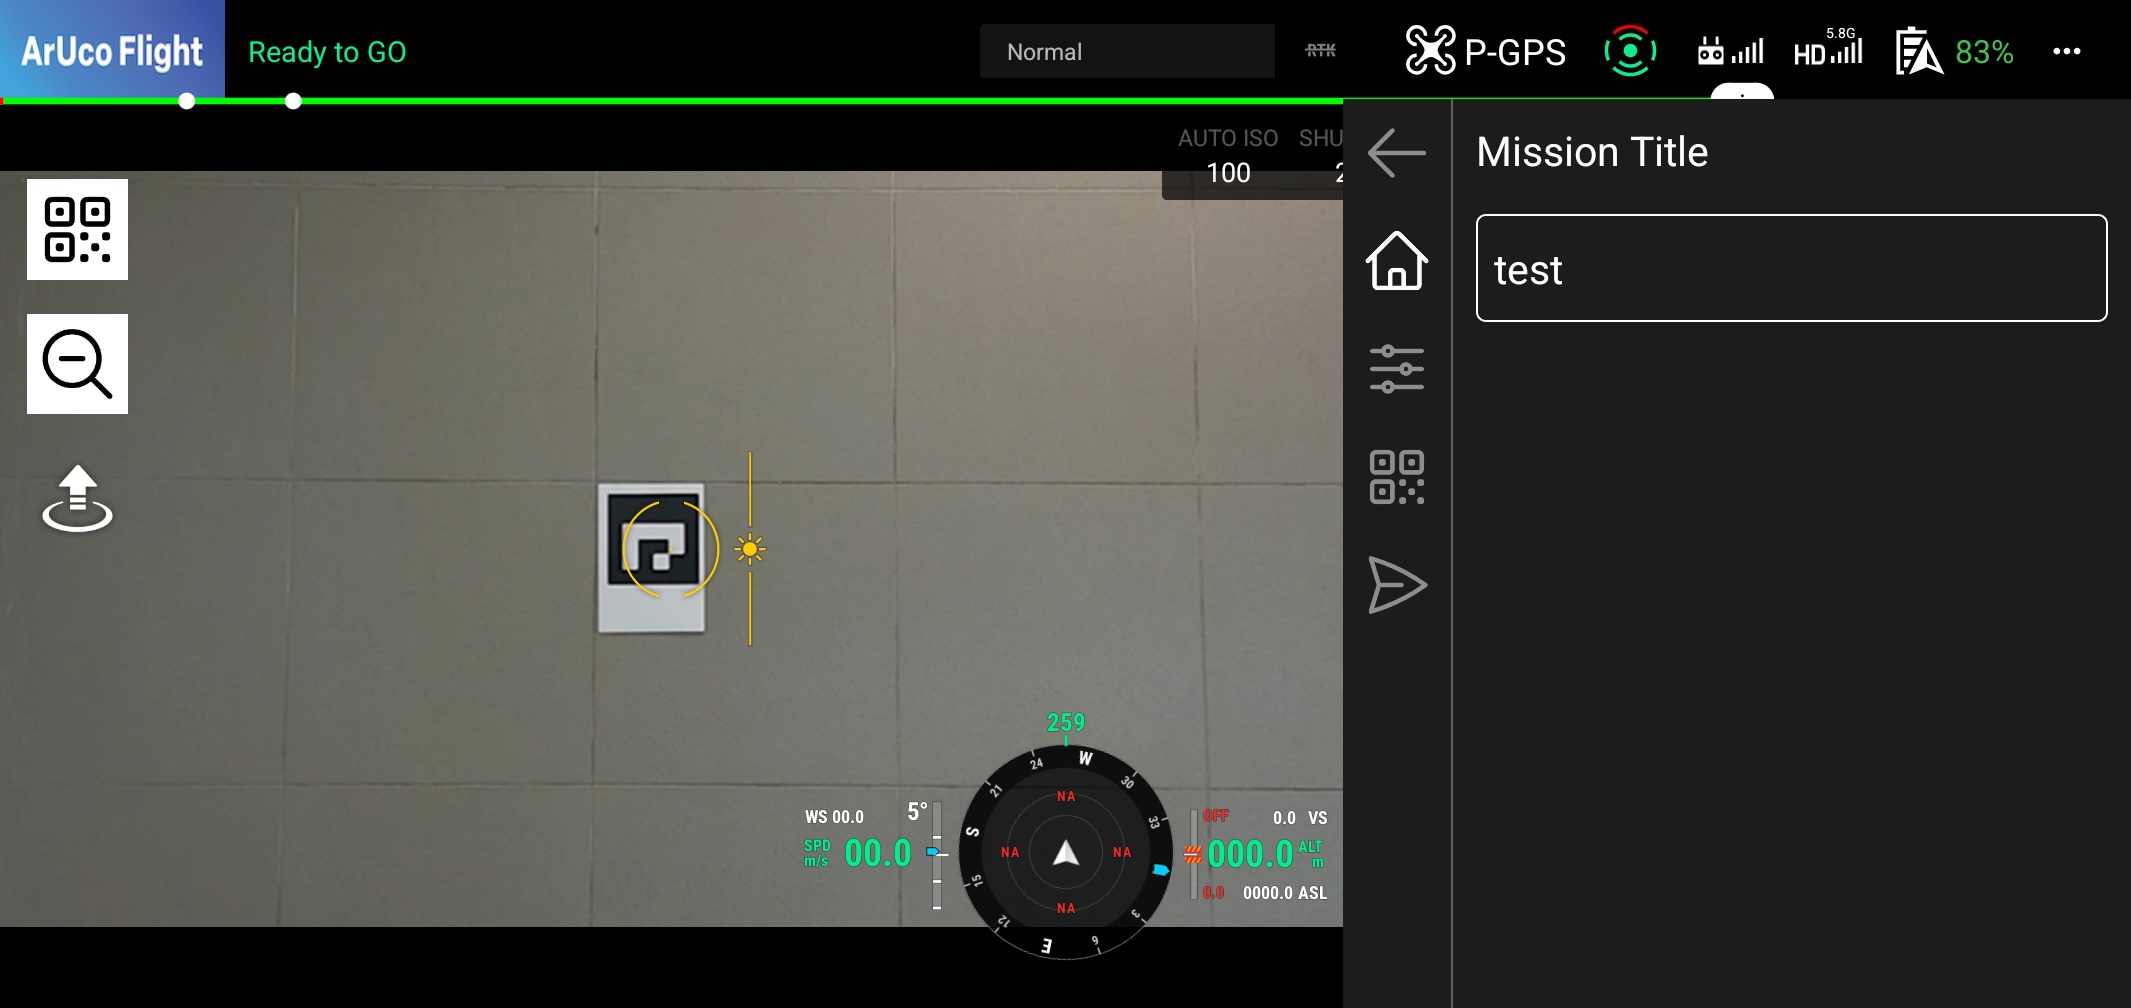
- Title: The first tab is the mission title. You can enter a title for your mission here.
- Configuration: The second tab is the mission configuration. You can set up the mission configuration here.
- ArUco Marker: The third tab is the markers. You can set up the markers here.
- Save/Execute: The fourth tab is the camera. You can set up the camera settings here.
Title Tab
The first field is the mission title. You can enter a title for your mission here. This title will be displayed in the mission list.
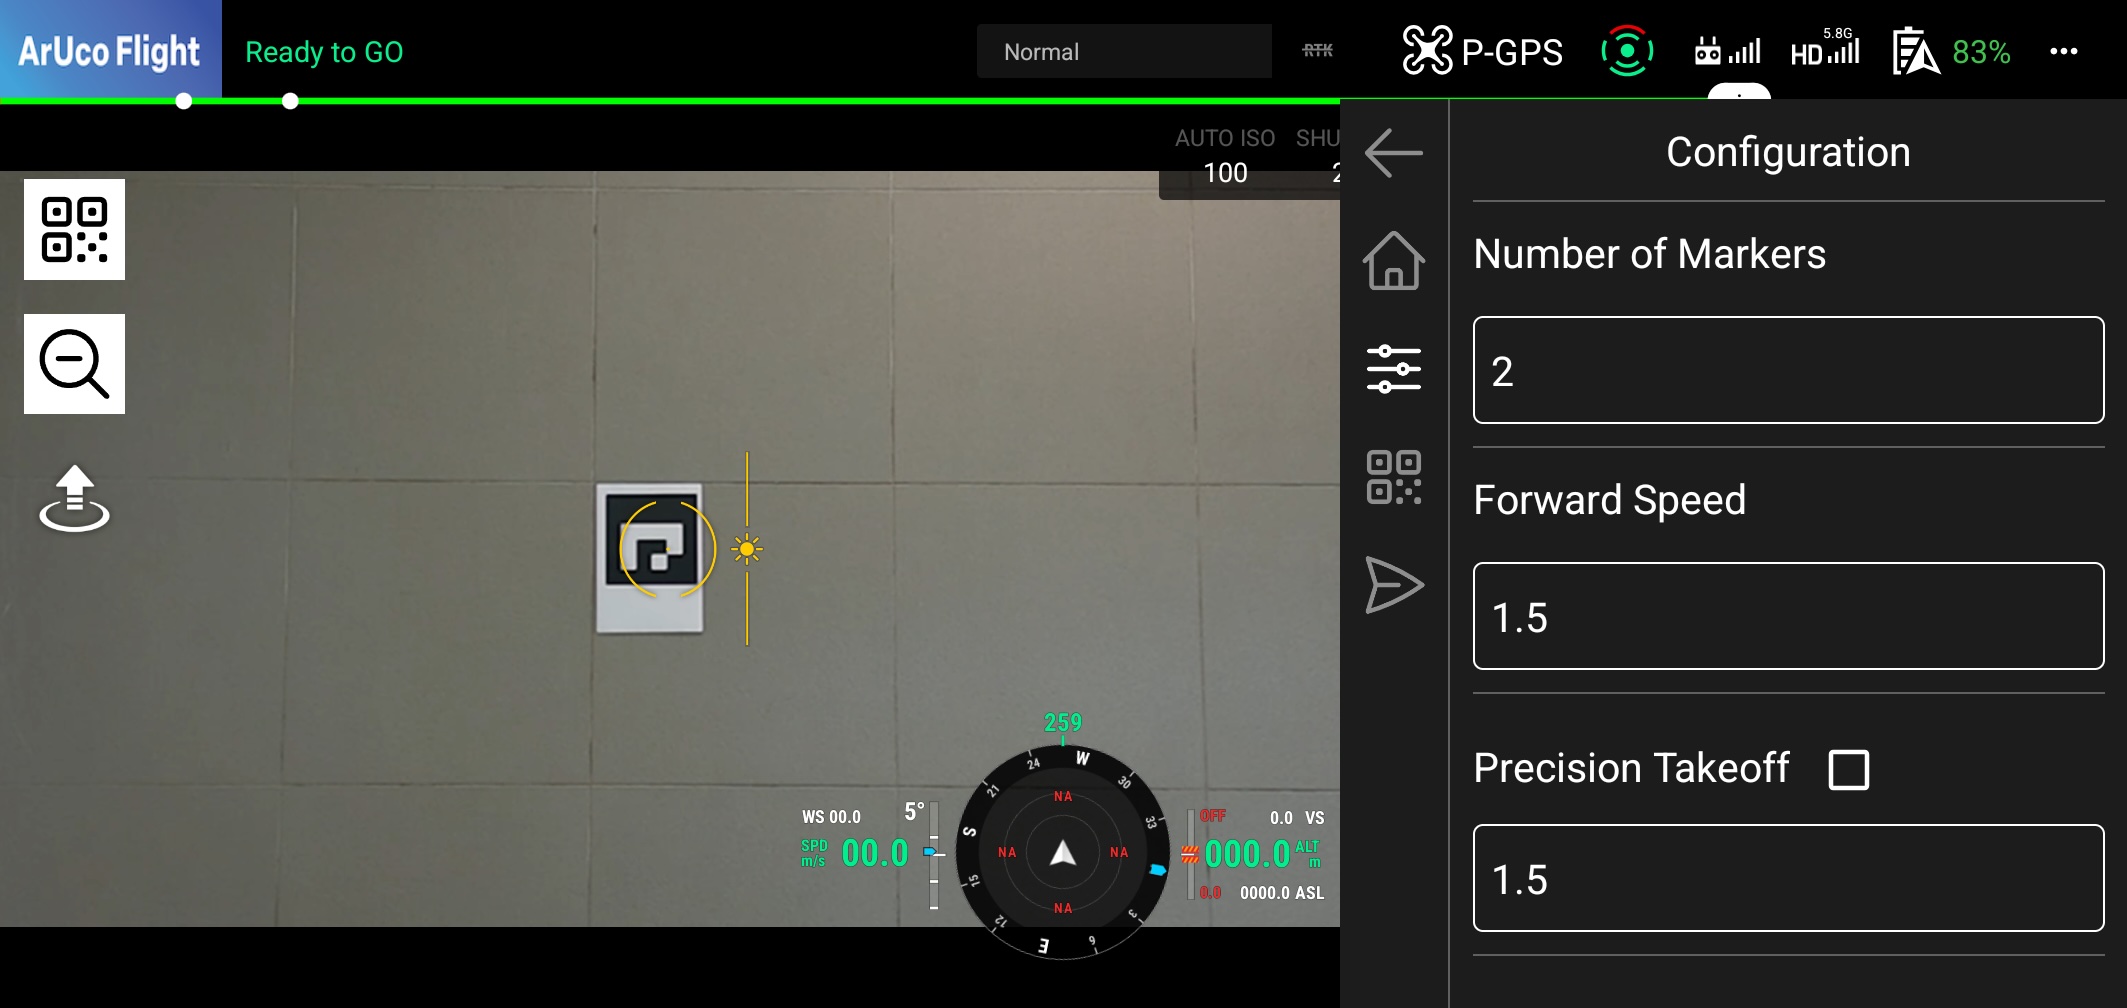
Configuration Tab
The second field is the mission configuration. You can set up the mission configuration here. This configuration will be applied to the entire mission, and you can also change some of the parameters for each marker in the marker tab.
Configuration Parameters
The configuration includes the following fields:
| Name | Description | Remarks |
|---|---|---|
| Number of Markers | The number of markers to use in the mission. | Default value: 1 Input range: 1-99 |
| Forward Speed | This is the distance traveled in metres per second. | Default value: 1.0 Input range: 0.1 - 3.0 Unit: meters/second |
| Precision Takeoff | Enables precision takeoff. When taking off, the aircraft will rise to a specified distance from a marker placed on the ground. Please be aware of the ceiling height. | Check the box to enable. Default value: 1.5 Input range: 0.5 - 3.0 Unit: meters If enabled, the first marker will be used as the takeoff marker. |
| Precision Landing | Enable precision landing. When landing, the drone will automatically descend to a marker placed on the ground. After descending to the specified height, it will enter landing mode. | Check the box to enable Default value: 1.5 Input range: 0.5 - 3.0 Unit: meters If enabled, the last marker will be used as the landing marker. |
| Rotation Direction | Specifies the direction of rotation of the drone when searching for a marker. If you want to change it for an individual marker, you can do so from the marker settings screen | Default value: Left |
| Rotation Speed | Specifies the rotation speed of the drone when searching for a marker. If the rotation speed is too fast, it will affect marker recognition | Default value: 6.0 Input range: 1.0 - 20.0 Values between 6.0 and 10.0 are recommended |
| Distance Threshold | When the distance between the drone and the marker is less than the specified number of meters, the task will be completed. | Default value: 1.5 (meters) Input range: 0.5 - 10.0 |
| Gimbal Angle | Specifies the initial gimbal angle during flight. | Default value: Left Input range: -90 to 30 -90 degrees: Directly below 30 degrees: 30 degrees above |
| Wait time on each task | Specifies the amount of time to wait before starting to move to each marker | Default value: 1.0 (seconds) Input range: 0 to 5 |
| Auto Zoom | Specifies whether to turn on or off the automatic zoom adjustment function when flying over a marker. | If the distance between the drone and the marker is more than 8m, the marker may not be detected correctly. Therefore, please use this function. |
| Vertical Move | The drone's height will automatically change when flying over a marker. | |
| The target marker will move up and down so that it approaches the central angle of 0 degrees (as seen from the drone) on the drone's screen. | Please use caution when there are obstacles around the drone. | |
| Upon Completion | Specifies the action to be taken when the mission ends. | Default value: Hover Input value: Landing: Land after the last marker Hovering: Hover on the last marker Loop: Repeat the same mission after the last marker |
ArUco Marker Tab
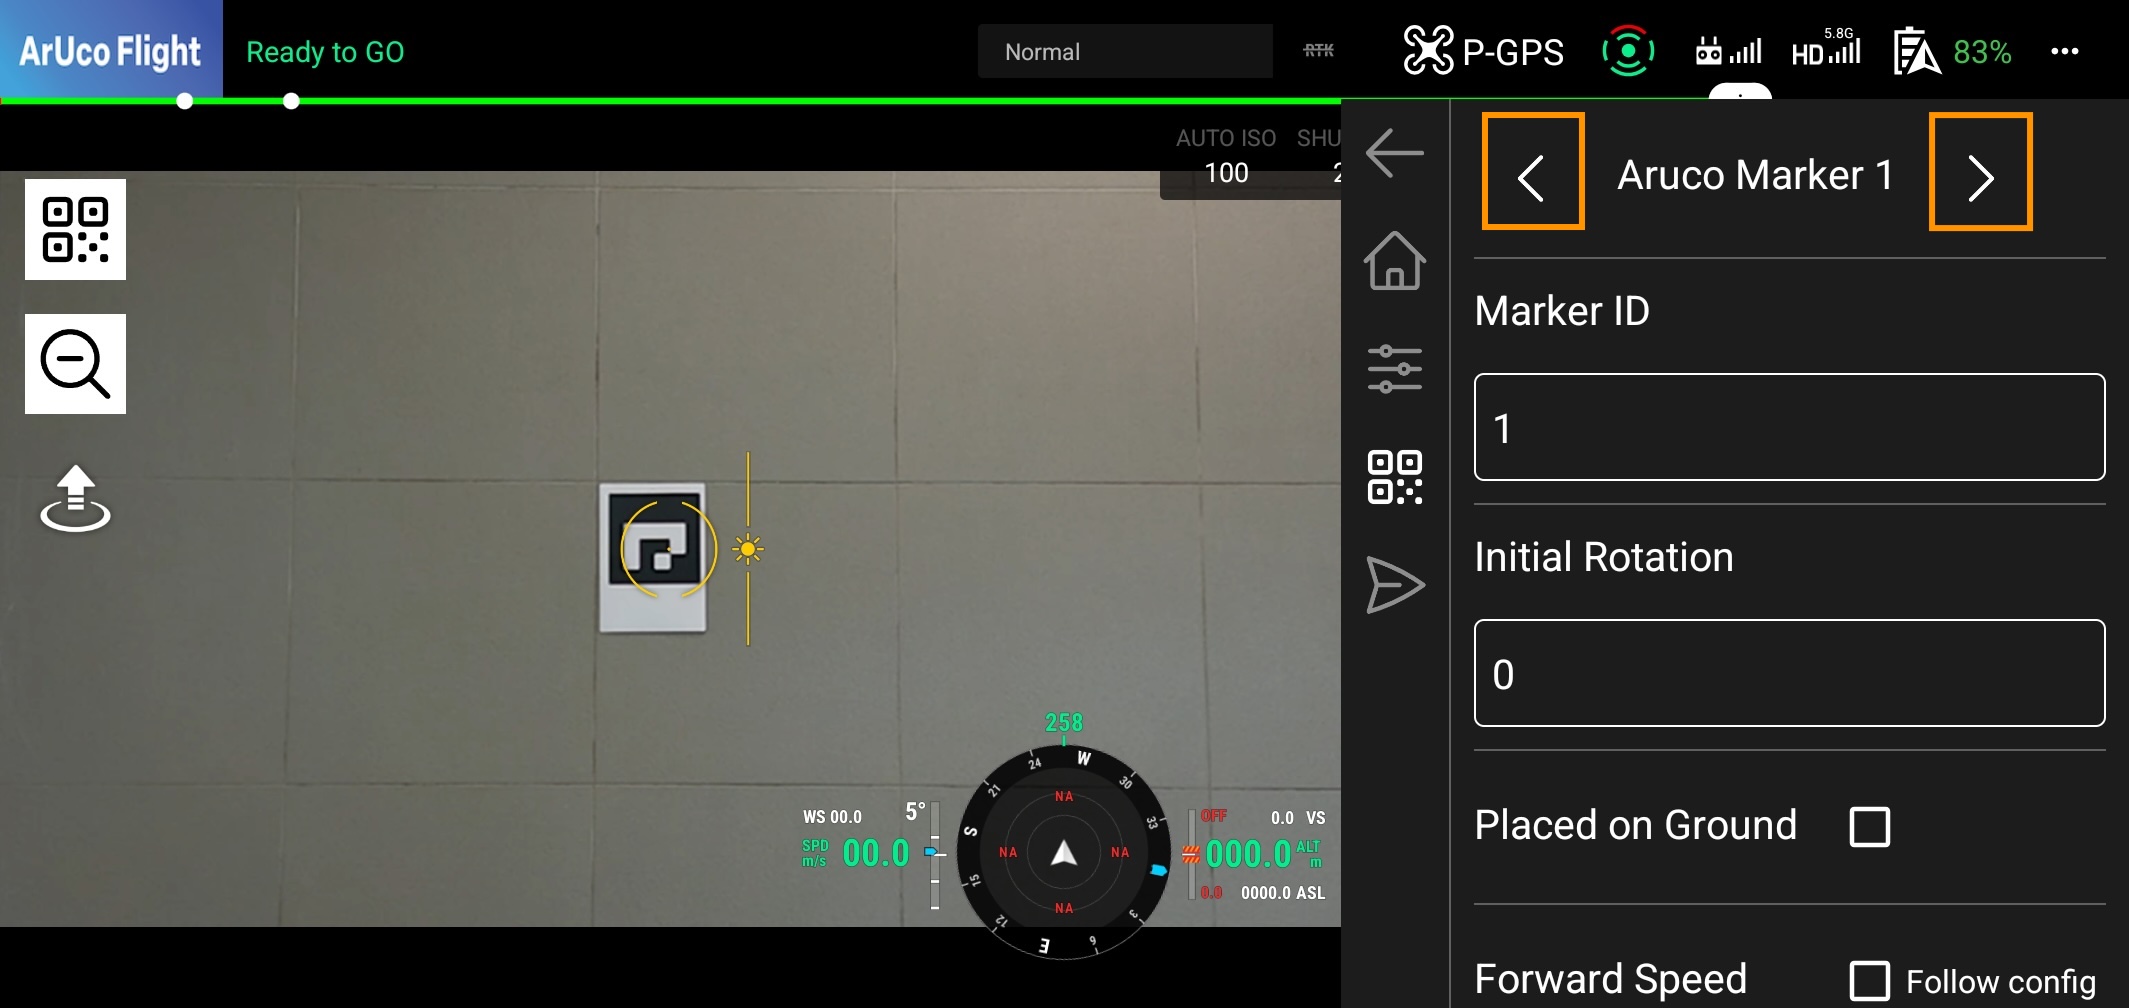
you can set up the configuration for each marker in the marker tab. you are able to change the current marker by clicking the arrow button at the top-right/left of the marker tab (orange colored). you can change the number of markers by inputing the number in the Number of Markers field in the configuration tab.
Follow Configuration
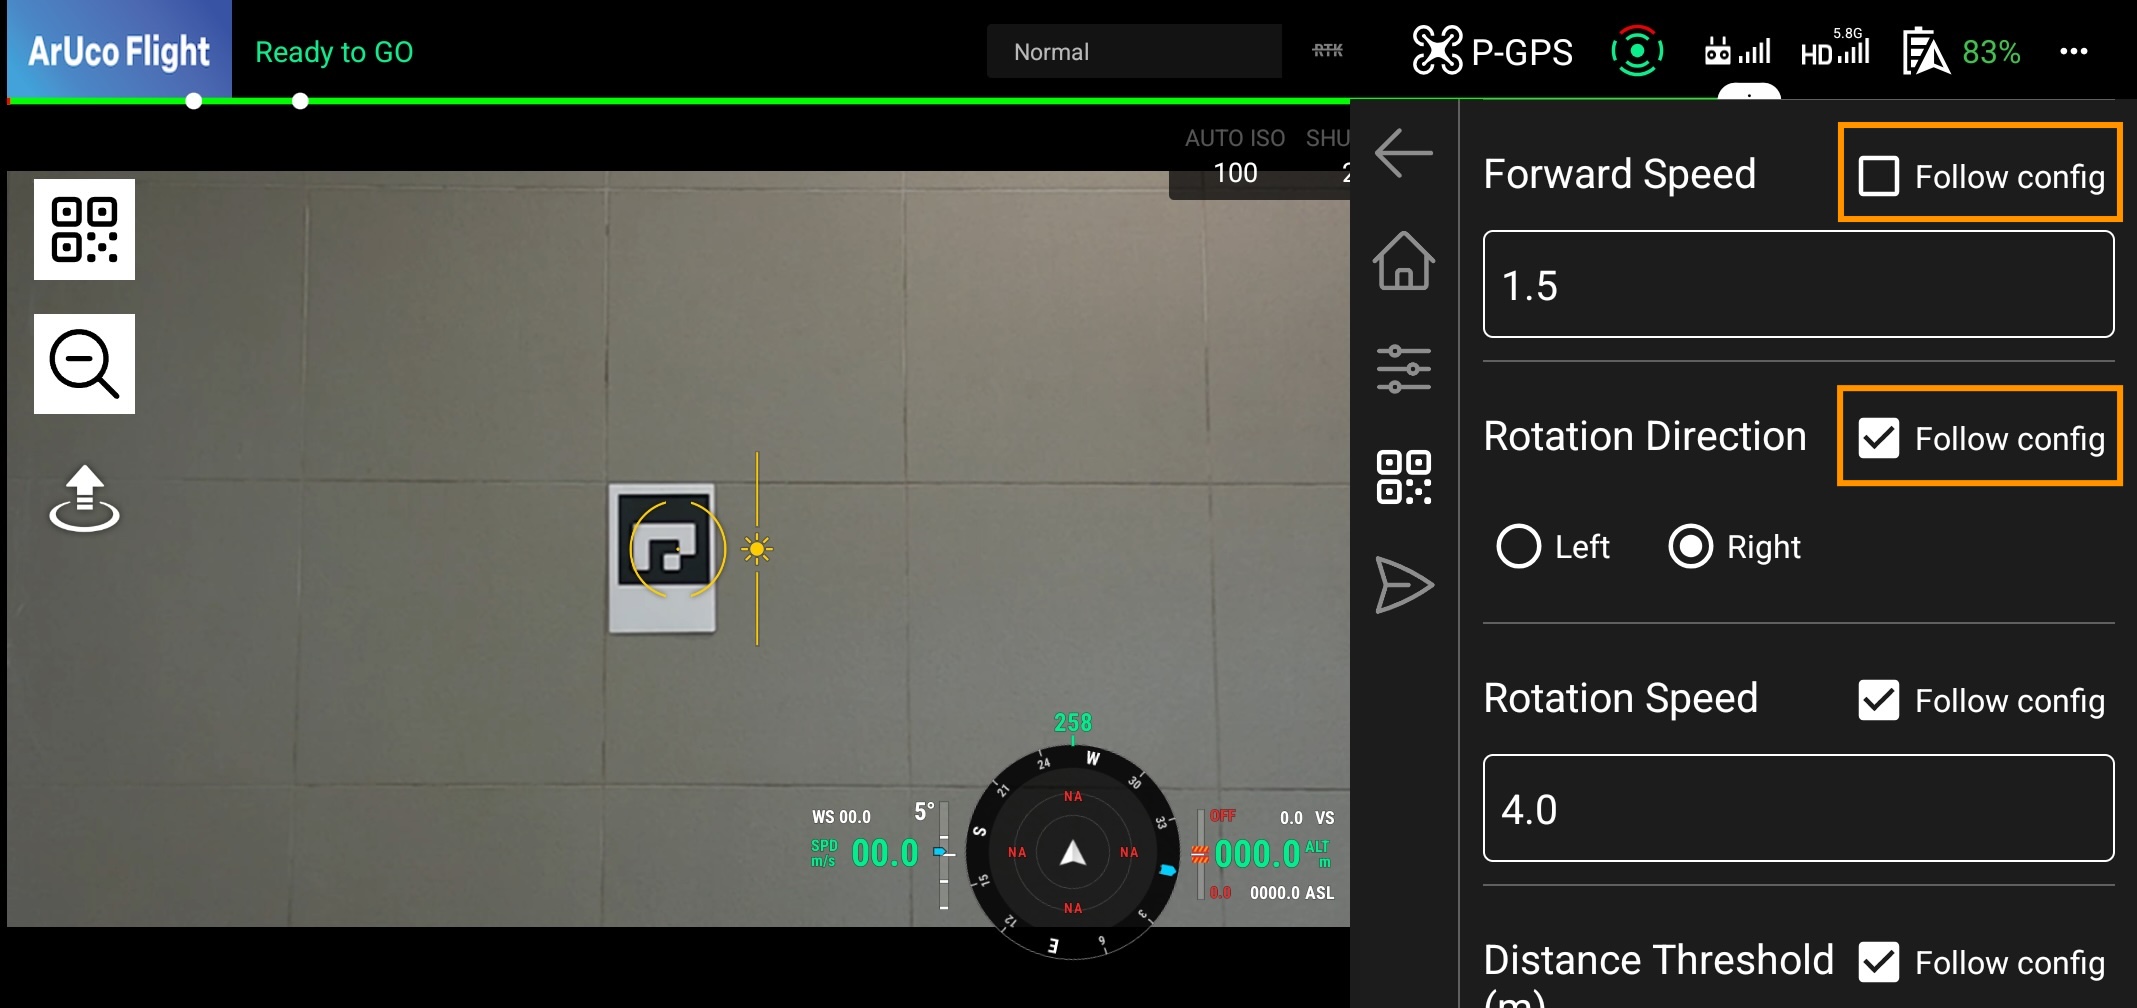
Some of the configuration parameters in the marker tab are inherited from the configuration tab. If you want to change the value for each marker, you can do so by clicking the Follow Configuration button (orange colored). This will allow you to change the value for each marker.
Marker Parameters
The parameters includes the following fields: *Explanation of parameters that are the same as the configuration is omitted.
| Name | Description | Remarks |
|---|---|---|
| Marker ID | The ID of the ArUco marker. | Input range: 0 ~ 99 You can create each ID using the generator here https://chev.me/arucogen/ |
| Initial Rotation | Rotates at high speed from the current drone direction to the direction of the next target (specified angle). Normally, the drone searches for the next target while rotating at a slow speed, but by specifying the initial rotation angle, the search time can be shortened. | Input range: 0 ~ 179 If it is 0, high speed rotation will not occur. |
| Place on Ground | Turn this on if you want to place markers on the ground | The task is completed when the drone lands on the marker. |
Save Tab
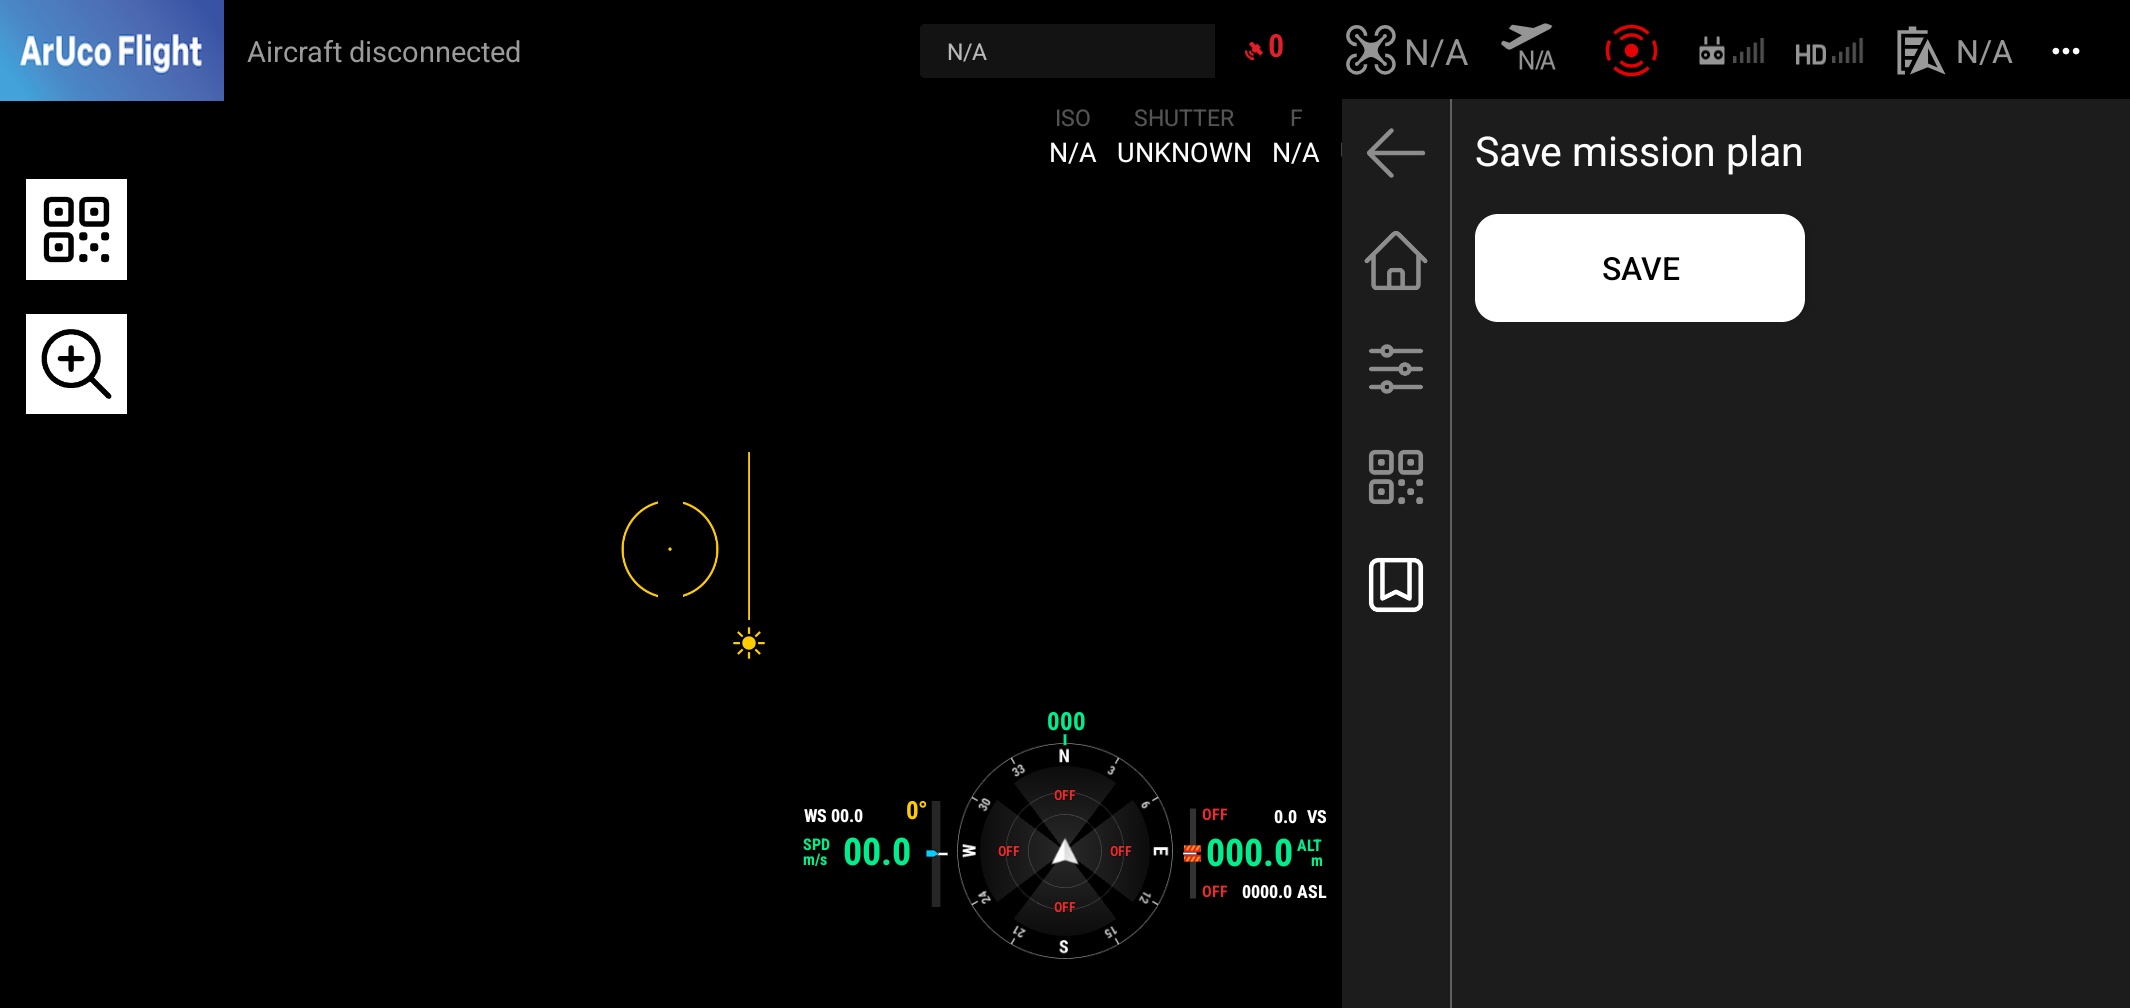 Once you have set up the mission configuration and markers, you can save the mission by clicking the Save button (green colored) at the bottom-right of the save tab. This will save the mission to the mission list.
Editing Mission
You can edit the mission by clicking the Edit button (orange colored). This will allow you to edit the mission configuration and markers.